


Hand Painted Furniture DIY has rapidly evolved from quirky weekend projects into a leading way urban homeowners refresh interiors, save money, and express creativity with truly one-of-a-kind décor.
Key Takeaways
- Hand Painted Furniture DIY empowers anyone to refresh old furniture, personalize décor, and control project spend—but be realistic about time, surface prep, and finish complexity before starting.
- For truly durable, trend-forward painted furniture makeovers, modern materials like water-based paints and eco-friendly primers are beginner-friendly but advanced looks often require pro skills.
- Custom commissions are on the rise; if work or detail level exceeds your confidence, vet artists with clear questions—DIY is not always cheaper or easier depending on goals.
- Why hand painted furniture is growing now — a quick market snapshot
- DIY vs. hiring a professional — decision checklist (time, cost, complexity)
- Common challenges and how to troubleshoot them (beginner and pro pitfalls)
- Materials that perform — beginner-friendly vs. pro-grade
- A step-by-step painted dresser makeover plan (realistic hours + tool & material checklist)
- Advanced decorative techniques and durability (for experienced DIYers & pros)
- 2024 trends & color palettes — hand-painted dresser and whimsical/floral looks
- Safety, regulations & eco-friendly best practices
- How to buy or commission a custom painted piece — what to ask and pricing signals
- Project inspiration and gallery (templates + pattern stencils & supply lists)
- Three overlooked deep-dive guides competitors rarely cover
- FAQ
Why hand painted furniture is growing now — a quick market snapshot
Hand painted furniture is riding a wave of renewed homeowner interest thanks to two market shifts:
the lasting appeal of personalization and a sharp rise in cost-conscious, sustainability-focused makeovers.
According to recent market analysis,
the global furniture paint industry was valued at USD 10.03 billion in 2023—with annual growth around 6.2% set to drive it to USD 18.32 billion by 2033.
DIYers, especially urban dwellers like Emma, are fueling demand: the overall DIY furniture market is on track to hit
USD 180.07 billion by 2025.
Social media, upcycling trends, and supply-chain issues have all made Painted Furniture Makeover projects and custom commissions a mainstream hobby and business,
with an emphasis on personal style and sustainable home decor.
DIY vs. hiring a professional — decision checklist (time, cost, complexity)
Before diving into a Painted Furniture Makeover, weigh these factors to decide if you should tackle
DIY furniture painting or commission a pro:
- Your skill level: Can you prep, prime, and finish confidently, or is faux-marbled trompe-l’oeil beyond your experience?
- Time available: Simple dressers = 5–8 hours (over several days); detailed floral/multi-stage looks = 18+ hours, possibly weeks if layering, curing, or drying between steps.
- Finish complexity: Basic paint or chalk finishes are beginner friendly; intricate hand-drawn florals, gilding, or color blending suit professionals.
- Risk comfort: Mistakes on thrifted dressers can be sanded and retried. Pricier or sentimental pieces justify a pro’s guarantee.
- Budget: DIY materials may cost $50–$150, but mistakes and extra supplies add up; pro work for highly decorative looks often ranges $300–$1200+ depending on project scope.
The booming custom furniture market (USD 35.45B in 2025, $65.67B by 2032) underscores the value and demand of expert services.
If durability, complex styles, or time constraints matter most, ask for quotes and compare.
For simple, creative, or rustic upcycling, DIY offers a practical, cost-saving adventure—especially for chalk painted furniture or beginner-friendly finishes.
Need other ways to save on home projects? Compare ADU construction costs in this proven guide.
Common challenges and how to troubleshoot them (beginner and pro pitfalls)
Both new and experienced painters hit snags. Here are the most reported DIY issues, along with timely fixes and best practices for chalk painted furniture and upcycled painted furniture projects:
| Challenge | What Causes It | Fix / Prevention |
|---|---|---|
| Poor paint adhesion or peeling | Skipped surface prep, painting over glossy/dirty/varnished finishes | Degrease, sand lightly, use bonding primer—test on back panel first |
| Streaks or blotchy finish | Wrong brush/roller, overworked coats, inconsistent paint quality | Use quality synthetic angled brushes, avoid over-brushing, thin coats—sand lightly between |
| Paint dries too quickly/slowly | High humidity or air movement; wrong paint for climate/room | Work indoors with stable temps; pick water-based paints for fast dry, or slow with extender |
| Lead in vintage pieces | Old (pre-1978) finishes; unsafe sanding/stripping | Test with a lead test kit first; wear NIOSH masks; seal with shellac if paint isn’t removed |
| Hardware won’t come off | Poor tools or stuck screws on old hardware | Slowly loosen with proper screwdriver; use lubricant or tap gently—avoid stripping |
| Chalk paint flaking/distressing unintentionally | Skipped priming, too little topcoat, heavy wear areas | Use bonding primer; always seal with wax/poly if high-traffic |
| Paint consistency issues | Cheap craft paint, improper stirring, or old cans | Stir thoroughly, strain if chunky; use reputable brands—market data shows consistency is a top concern (source) |
For more tips on avoiding DIY headaches in home improvement, see these 2025 home improvement trends.
Materials that perform — beginner-friendly vs. pro-grade
Your project’s success hinges on using the right materials for your experience and style goal.
Research shows water-based paints top most lists—and for good reason: they clean up easily, resist yellowing, and boast lower VOCs.
- Beginner-Friendly: Latex or acrylic water-based paints, chalk paints (for matte, vintage looks), and pre-mixed kits. Synthetic angled brushes and small foam rollers limit drips and maximize coverage on flat or curved surfaces.
- Pro-Grade Upgrades: Milk paints (for ultra-matte vintage), artist-grade acrylics (detailed designs), HVLP sprayers (glass-smooth finishes), oil enamel accents (for hardcore durability, though cleanup is tougher).
- Primers & Topcoats: Bonding primers for glossy/laminated furniture. Seal with water-based polyurethane or clear wax (for chalk/milk paint), or try water-based polys for low odor, fast cure, and eco safety.
For best adhesion: always degrease, lightly sand, and remove dust before painting. Curious about organization upgrades? Our fabric drawer dressers perform great as upcycle bases.
A step-by-step painted dresser makeover plan (realistic hours + tool & material checklist)
Here’s a realistic method for a hand painted dresser makeover, balancing time, cost, and creative ambition—plus quick variations for current trends.
Budget-friendly project: Simple dresser (3- or 4-drawer), beginner/intermediate skill, 1–3 days (6–10 working hours total).
- Prep (1–2 hours): Remove hardware, clean surfaces with degreaser, lightly sand glossy/laminate sections, vacuum and tack-cloth dust. Do a lead test kit on vintage pieces before sanding/scraping.
- Prime (30 min active; plus dry time): Apply bonding or stain-blocking primer, using brush for corners and foam roller for flats. Let dry as label directs.
- Base Paint (1–3 hours split over 2 coats): Apply thin coats (water-based for beginners). Sand lightly between with 220 grit if needed.
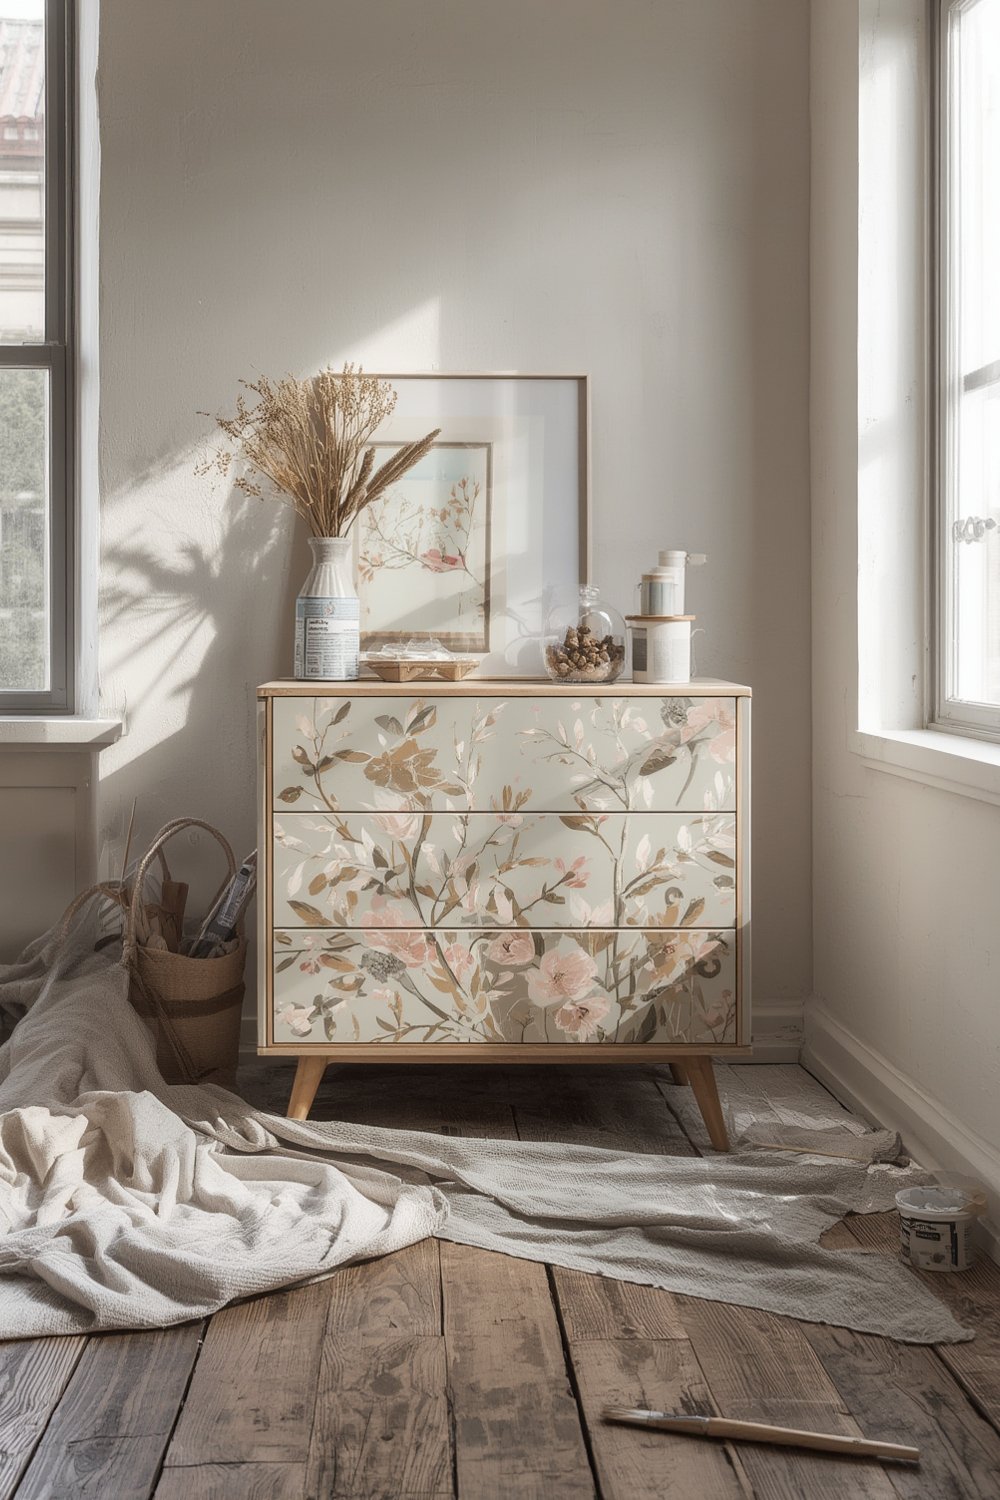
- Decorative Work (1–3 hours): For floral/whimsical looks, sketch designs in chalk or use stencils. Fill in with artist brushes and acrylics.
- Finishing (1 hour active; overnight cure): Seal with 2–3 coats of water-based poly (for high traffic/stain resistance) or furniture wax (for chalk or matte). Reattach hardware.

Quick Variations:
Chalk-Style: Use chalk paint all over, distress gently with sandpaper after dry, and wax for a soft, heritage finish.
Floral: Paint or stencil border florals/flourishes on drawer faces or side panels with small artist brushes.
Distressed: Layer two close colors, then sand corners/edges to allow bottom color to peek through.
Basic tool & supply list:
- Microfiber cloths, degreaser, painter’s tape or cling wrap
- Sanding block (120 + 220 grit), lead test kit for older furniture
- Good quality brush set (angled, artist round, flat), foam roller
- Primer (water-based recommended for most DIY), furniture paint (chosen color and finish)
- Artist acrylics or paint pens (if adding details), stencil (if desired)
- Protective gloves, mask (especially for sanding)
- Sealer: water-based poly (matte/satin) or clear wax
For even more budget-saving results, consider upcycling with reclaimed dressers or storage like the SONGMICS Mazie Collection.
Advanced decorative techniques and durability (for experienced DIYers & pros)
Ready to level up beyond basic paint? These techniques raise the bar for decorative painted furniture and vintage painted furniture looks. Each step may add hours or days, but the end result is truly custom:
- Layered glazes: Apply diluted translucent colors between base coats for depth on edges or panels.
- Gilding/Gold Leaf: Use adhesive sizing and sheets for borders or details; seal well for longevity.
- Decoupage: Adhere decorative paper or fabric insets, then seal with acrylic poly.
- Reverse stenciling: Paint base, lay down stencils, add top color, then peel for dimensional designs (great for geometrics or florals).
- Trompe-l’oeil/faux marble: Use artist brushes for shadow/highlight lines and subtle sponging; finish with multiple clear coats.
- Fine-line hand detailing: Liners/stripers or paint pens make intricate botanical lines sharp without shakes.
Choose application tools based on finish:
Brush: Classic matte, visible strokes, layered color.
Roller: Even, low-texture on big flat sides.
Sprayer: Pro-level, flawless on large pieces—requires prep (plastic drop, mask walls/floors!) and practice.
Note: Because the custom furniture market is booming (USD 65.67B worldwide by 2032), hiring or collaborating with a pro for these layered finishes could save time and avoid costly errors—especially for statement pieces.
For inspiration on versatile furniture upgrades, see this shoe rack bench review for multipurpose ideas.
2024 trends & color palettes — hand-painted dresser and whimsical/floral looks
The biggest whimsical painted furniture and floral painted furniture looks in 2024 are all about muted pastels, botanical line work, and playful but gentle color blocking. Social trends and water-based technology dominate: more people want eco-friendly, unique pieces, not cookie-cutter sets.
- Palettes: Dewy sage, moonglow clay, blush-pink, stone gray, dusty blue, and warm earthy neutrals lead the way.
- Motifs: Hand-drawn florals on drawer corners; billion small “doodle” botanicals across panels; stylized woodland, storybook, or magical creatures (excellent for accent drawers or children’s dressers).
- Placement: Try color-blocked borders, inside-drawer surprises (florals painted inside or patterned paper decoupage), or two-tone drawer faces with contrasting whimsical pulls.
These styles fit especially well with upcycled or vintage furniture. Use water-based paints for easy layering and safe cleanup, as they are the most popular—and practical—for modern trend adoption (research).
Looking for color inspiration to match your newly painted furniture? See these small porch color and lighting trends.
Safety, regulations & eco-friendly best practices
Safety and sustainability are core concerns in upcycled painted furniture and Hand Painted Furniture DIY. Here’s how to keep yourself and your home safe while protecting the environment:
- VOC awareness: Choose low-VOC or zero-VOC paint/primers for all indoor pieces. Avoid oil paints indoors without heavy ventilation.
- Lead testing: If your thrifted or vintage furniture could be pre-1978, always test old finishes for lead before sanding or stripping. Use a certified kit, and don’t dry sand unless negative.
- Eco–friendly paints: Select brands that use recycled content, natural pigments, or plant-based binders. Water-based paint dominates for a reason: lower odor, faster cure, easier cleanup.
- Ventilation/PPE: Use fans and open windows while painting. Wear gloves and a mask when sanding and priming.
- Responsible waste: Never pour excess paint or solvents down the drain; take to hazardous waste collection or use solidifying powder for disposal. Soak oily rags in water and dry flat to prevent fire hazard.
- Materials sourcing: Opt for reclaimed wood, thrifted casegoods, or fiberboard with eco certifications where possible.
Eco-conscious home upgrades are more popular and practical than ever—learn more about sustainable waste solutions with our kitchen compost bin reviews.
How to buy or commission a custom painted piece — what to ask and pricing signals
Commissioning a hand painted dresser or unique decorative item is more accessible than ever. Before you hire, use this questionnaire to vet artists and avoid surprises:
- Portfolio: Can you see photos of similar past work, especially in your desired color/finish?
- Materials/methods: What paint, primer, and sealer brands will they use? Do they prep, prime, and topcoat as per best practice?
- Durability guarantee: How do they ensure chip resistance, water protection, and cure time for daily use?
- Timeline: What is the estimate from drop-off to completion? What happens if delays occur?
- Insurance/licensing: Is their workshop insured, and are delivery/pickup options safe?
- Pricing signals: Expect simple repaint (single color, minor repair) from $150–$350. Full floral or custom-motif projects often range $400–$1200+, depending on size and detail. Contracts should outline all phases, materials, and schedule.
The custom painted furniture industry (USD 35.45B in 2025) is growing fast, so book early for in-demand local artists or national online commission services.
For a ready-to-use, budget-friendly organizer, check our cube organizer review.
Project inspiration and gallery (templates + pattern stencils & supply lists)
Need no-guesswork inspiration? Try one of these six project templates with time, cost, and difficulty cues. All use standard DIY kits; upgrade materials/techniques for pro-level finishes:
- 1. Budget Beginner Dresser (5–6 hrs, $60; Easy): Solid color, simple handles, sealed with water-based poly.
- 2. Two-Tone Modern (6–8 hrs, $70; Easy/Intermediate): Bold drawer faces or base/legs contrast, subtle color block.
- 3. Floral Statement Drawer (9–14 hrs, $90; Intermediate+): Pastel background, wildflower meadow detail, stencil optional.
- 4. Vintage-Distressed (7–10 hrs, $75; Intermediate): Chalk paint with sanded corners, matte sealed, gentle rub-throughs.
- 5. Drawer-Interior Surprise (6–8 hrs, $80; Easy): Single color outside, wallpapered or hand-painted botanical inside drawers.
- 6. Whimsical Kids’ Dresser (10–16 hrs, $100; Intermediate): Playful color palette, cartoon motifs, themed handles.
Quick supply list for each: Primer, water-based paint (main + accent), detail brushes, 220 grit sandpaper, foam roller, artist acrylics, wax/poly, lead test (if vintage), gloves, mask, and stencils or pattern templates if desired.
Pair your painted furniture with healthy indoor air—see our LEVOIT air purifier review for a cleaner workspace.
Three overlooked deep-dive guides competitors rarely cover
Ready to go deeper? Few sites cover these practical, high-value topics for vintage painted furniture and upcycled painted furniture:
- Lead-test & safe restoration workflow: How to test, seal, or remediate vintage/antique furniture safely before any painting or sanding work—a must for midcentury or older dressers.
- Long-term maintenance and touch-ups: Best practices and DIY “repair kits” for painted or decorative pieces—how to touch up chips, prevent peeling in high-traffic areas, protect finishes seasonally, and what cleaning products to use/avoid.
- Project cost/time breakdowns: Downloadable templates and estimator spreadsheets to plan DIY vs. pro project hours, materials, and compare quote ranges for custom commissions. This allows sharp budgeting and avoids “hidden” DIY cost overruns.
No large competitors offer these as stand-alone guides, which is your chance to maximize the results and value of your hand-painted furniture DIY investment.

FAQ
How long does a typical hand painted dresser project take from start to finish?
Most beginner/intermediate DIY painted dresser projects require six to twelve hours of active work, spread across two to four days for drying and curing. Very detailed, layered, or custom-commissioned dressers may take several weeks.
Do I need to sand furniture before painting if I use chalk paint?
Light scuff-sanding is always safest, even with chalk paint, to help adhesion and avoid chipping on slick or heavily varnished surfaces. Thoroughly degrease first; consider bonding primer for high-gloss furniture.
How can I avoid brush marks or streaks in my painted furniture?
Use high quality synthetic brushes, apply thin coats, and sand lightly between layers. Water-based paints help; avoid overworking each section. Try a foam roller for large flat surfaces.
Is it safe to paint over old furniture if I don’t know its history?
Always test for lead paint on furniture made before 1978; use precaution when sanding or stripping. Wear PPE, and if in doubt, seal with shellac primer to encapsulate any unsafe finish.
What’s the difference between wax and poly as a topcoat for furniture?
Wax gives a soft, matte look best on chalk or milk paint—ideal for vintage styles and light use. Water-based polyurethane offers better protection against moisture, scratches, and heat overall, perfect for dressers used daily.